Straw Blankets
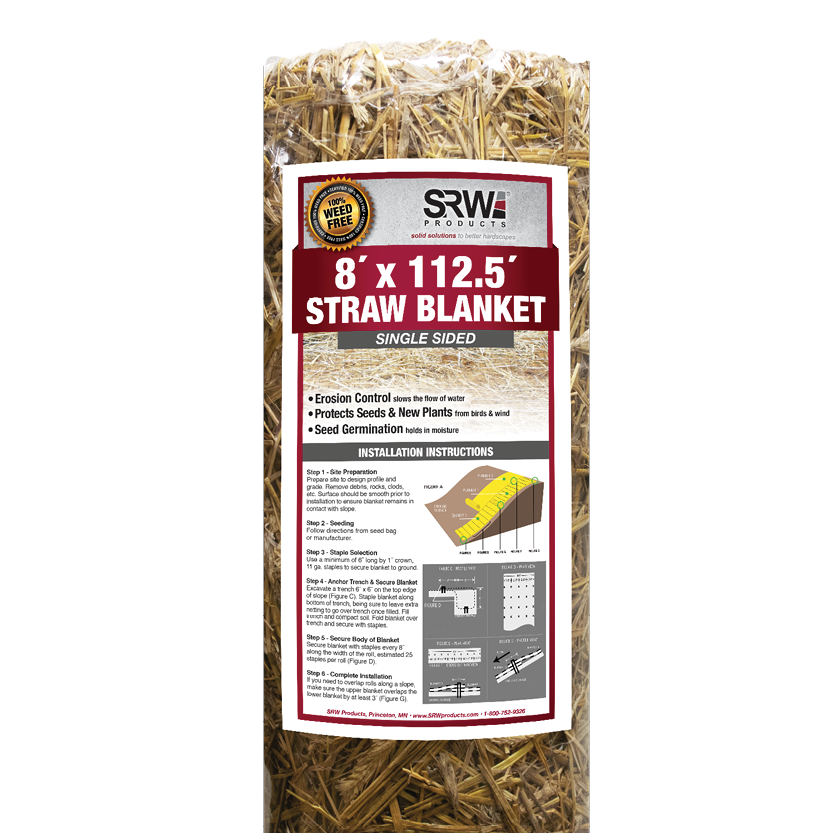
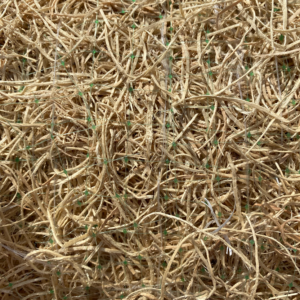
SRW Straw Blankets are weed-free, woven straw material that serves as a mulching layer for your projects. Our straw blankets provide erosion control for up to one year.
Available in single or double side options.
Features
Applications
Product Details
Features
- Weed-Free Straw
- Erosion control for up to one year
- Serves as a mulching layer
- Single or double-sided options
- Natural or Synthetic Net
Applications
- Single Sided: 3:1 Slope
- Double Sided: 2:1 Slope
- Cover Septic Systems
- Highway Slopes
- Embankments
- Shoreline Stabilization
Product Details
Straw Blankets | Single Sided*
| PART NUMBER | SIZE | SQ YDS/ROLL | QUANTITY |
| FCMB STSINGLE 4 | 4’x50′ | 22.22 | 40/PLT |
| FCMB STSINGLE 4 CTN | 4’x50′ | 22.22 | 9/CTN (4CTN/PLT) |
| FCMB STSINGLE | 8’x112.5′ | 100.00 | 25/PLT |
*Pallet quantities may vary
Straw Blankets | Double Sided*
| PART NUMBER | SIZE | SQ YDS/ROLL | QUANTITY |
| FCMB STDOUBLE | 8’x112.5′ | 100.00 | 25/PLT |
*Pallet quantities may vary
Contractors & Homeowners
Visit our Dealer Locator to find out where you can purchase our products!
Straw Blankets Instructions
Site Preparation
- Prepare site to design profile and grade. Remove debris, rocks, clods, etc.
- Ground surface should be smooth prior to installation to ensure the blanket remains in contact with the slope.
Seeding the Site
- Seeding of the site should be conducted to design requirements or to follow local or state seeding requirements as necessary.
Staple Selection
- At a minimum, 6 in. long by 1 in. crown, 11 gauge staples are to be used to secure the blanket to the ground surface.
- Installation in rocky, sandy, or other loose soil may require longer staples.
Excavate Anchor Trench & Secure Blanket
- Excavate a trench along the top of the slope to secure the upstream end of the blanket. The trench should run along the length of the installation, be 6 in. wide and 6 in. deep.
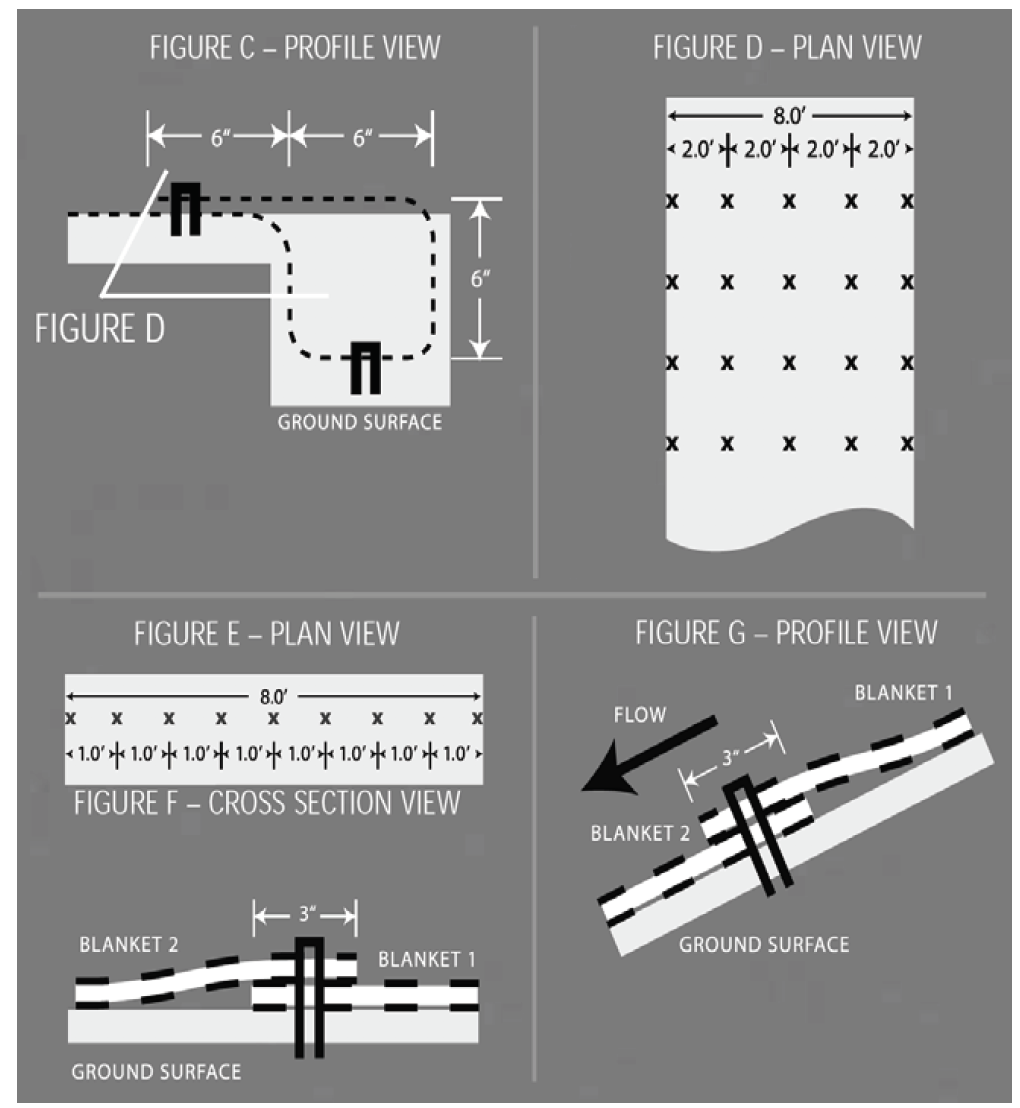
- Staple the blanket along the bottom of the trench, fill it with compacted soil, overlap the blanket towards the toe of the slope, and secure it with a row of staples (shown in Figures A, E, and F).
Secure Body of Blanket
- Roll the blanket down the slope from the anchor trench. Staple the body of the blanket following the pattern shown in Figure D. Leave the end of the blanket unstapled to allow for overlap shown in Figure B.
- Place the downstream blanket underneath the upstream blanket to form a shingle pattern. Staple seam as shown in Figure E. Secure downstream blanket with stapling pattern shown in Figure D.
- Stapling pattern shown in Figure D reflects minimum staples to be used. More staples may be required to ensure the blanket is sufficiently secured to resist mowers and foot traffic and to ensure the blanket is in contact with the soil surface over the entire area of the blanket.
- Further, critical points require additional staples. Critical points are identified in Figure G.
Continue Along Slope & Complete Installation
- Overlap adjacent blankets as shown in Figure C and repeat Step 5.
- Secure the toe of the slope using the stapling pattern shown in Figure E.
- Secure the edges of the installation by stapling at 1.5′ intervals along the terminal edge.
Diagrams Referenced in Instructions: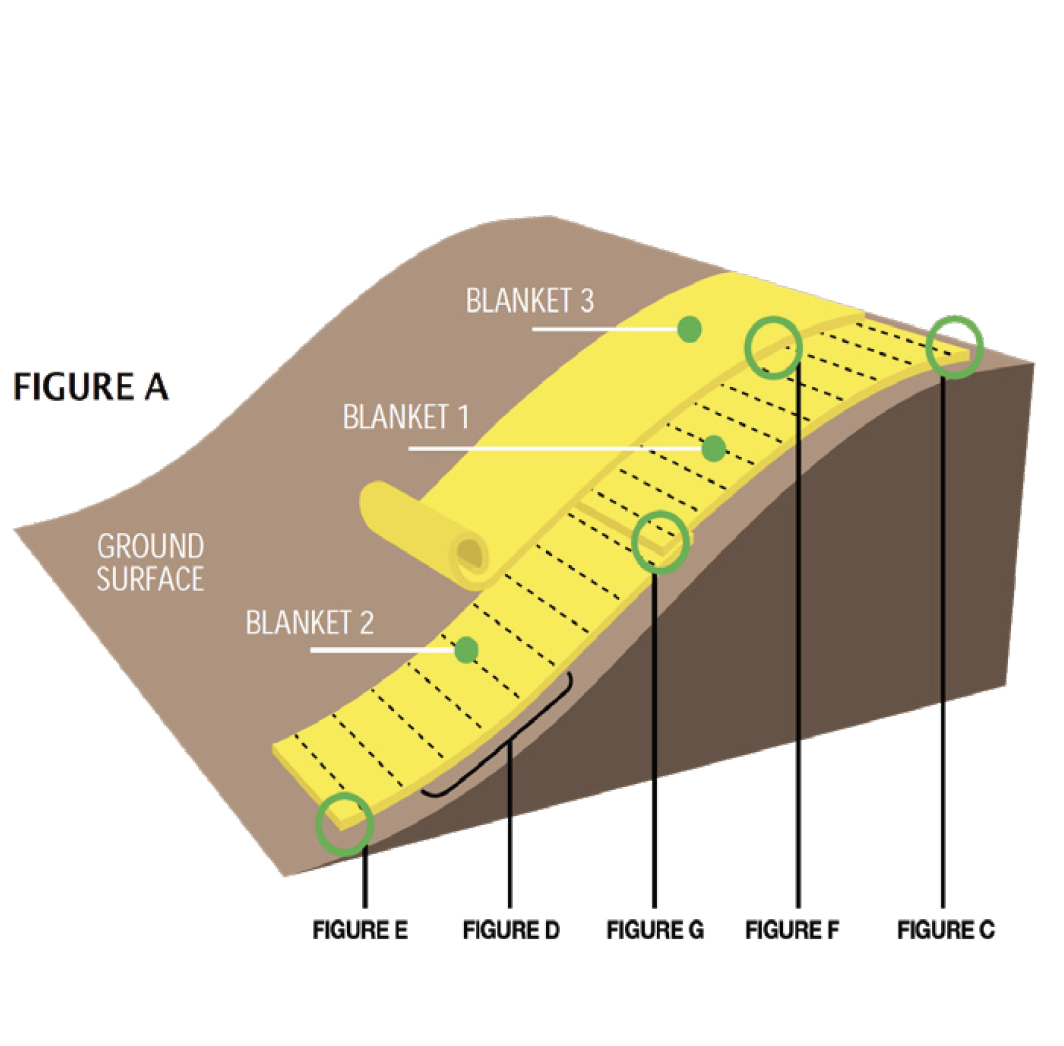
Customers Also Search
Related products
Frequently Asked Questions
Where can I buy SRW straw blankets?
Call us at 1-800-752-9326 or use our dealer locator. We will gladly help locate a dealer near you!
Do you have additional questions? Contact us.
Download Our Catalog

