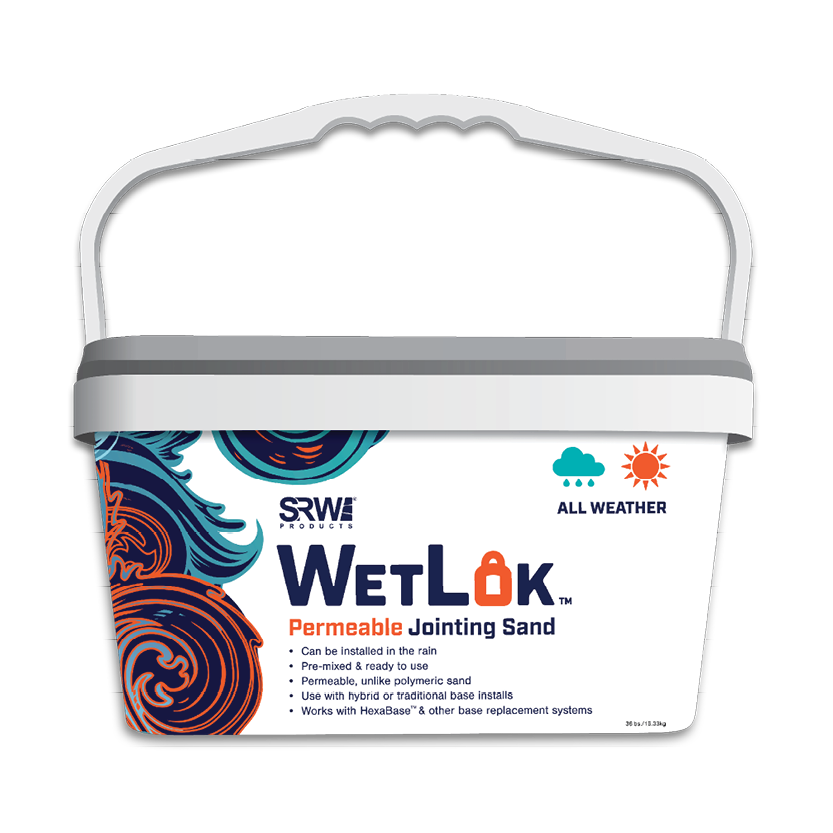
Wetlok™ Jointing Sand
Our Wetlok™ is the best choice for air-curing jointing sand to keep your paving projects simple and quick – no need for additional equipment. The pre-mixed formula can be installed in the rain and can withstand freezing conditions once installed. Save unused product for future use to save even more money.
- Can be installed in the rain
- Pre-mixed and ready to use
- Engineered for joints 1/8″ – 5″ (0.32 – 12.7cm)
- Permeable, allowing water to escape, unlike polymeric sand
- Works with hybrid or traditional base
- Safe from freezing weather after installed
- 12-month shelf life
- Can keep the unused product for future use
- Easy to use, simply brush into joints and compact with water
- Eco-friendly with 100% recyclable packaging
- Effectively resists weeds and plant growth
- Easy to clean
- Available in multiple colors
- NEW: Porcelain* (for pedestrian use only)
- NEW: Light Duty* Residential Interlocking Paver Driveways
- Concrete/Clay Pavers
- Wetcast
- Natural Stone
- Terracotta
- Patios
- Walkways
- Pool Decks
- Hybrid or traditional base installs
- Installations with HexaBase™ and other base replacement systems
*Find additional information on how to use WetLok™ for these applications below in the instructions below.
Wetlok™ Jointing Sand
| PART NUMBER | COLOR | SIZE | QUANTITY |
| WETLOK TAN 36 | TAN | 36 LB TUB | 65 TUBS/PLT |
| WETLOK GRA 36 | GRANITE | 36 LB TUB | 65 TUBS/PLT |
| WETLOK BLK 36 | BLACK | 36 LB TUB | 65 TUBS/PLT |
| WETLOK PLTM 36 | PLATINUM | 36 LB TUB | 65 TUBS/PLT |
| WETLOK BEACH 36 | BEACH | 36 LB TUB | 65 TUBS/PLT |
Visit our Dealer Locator to find out where you can purchase our products!
Wetlok™ Instructions
-
Wet the Surface
- Water helps to prevent the resin binding agent from settling on the surface which would create enhancement or framing around the edges of the paver or stone surface.
- The surface must remain saturated throughout the entire process to ensure the resin does not bind to the surface of the project. A good rule of thumb is if you are not sure you have enough water on the surface, add more.
-
Sweep Sand
- Pour the WetLok™ Jointing Sand into a pile on the wet surface. Immediately wet down the sand while a second person pushes it around using a broom/squeegee diagonally to the joints.
- Continuously wet the area in front and behind the broom/squeegee to help settle the sand into the joints.
- *SRW Products recommends the use of a roller compactor for installations with joints under 3/16″ as well as for light duty residential driveways applications. Testing joint depth every 100 sq. ft. (11.12 sq. yd.)
-
Fill Joints Completely
- WetLok™ will start to settle in the joints as water is added. If joints appear only partially filled, add more sand onto the surface while sweeping and watering to ensure joints are completely filled. The use of a plate compactor is not recommended.
- *When using WetLok™ for Light Duty Residential Interlocking Paver Driveways the use of a roller compactor is recommended.
-
Rinse
- When the joints are no longer accepting sand, rinse the surface to remove any excess sand and oily residue until the water runs clean.
-
Finishing
- Striking the joints is not required, but it will provide uniformity and the benefit of easier cleaning in the future.
- If uniformity is desired, wait for the surface of the project to dry and ensure no water remains in the joints before striking the joint. Then, using a pointing tool and very little pressure, finish the joint.
- After striking the joints, consider using a soft hand brush to remove any WetLok remaining on the project surface. Use short brisk movements with the brush to remove any excess sand from the surface of the project.
-
User-Tips
- USAGE NOTES
- Test in a small discrete area.
- A two-person application is recommended.
- Do not use on joints narrower than 1/8”.
- It’s critical to ensure there is zero movement within the hardscape surface prior to installation of WetLok. The porcelain, paver, wetcast, natural stone, terracotta, must not have any movement.
- Keep in mind that WetLok jointing sand can only be used in conjunction with a free draining base.
- If working with absorbent materials like some pavers and sandstone flagging, consider sealing with a penetrating sealer prior to the installation of sand.
- Sweeping the WetLok™ Jointing Sand diagonally to the joints will help to ensure joints finish evenly. Sweeping in the same direction as the joints could cause the broom to present an irregular appearance of the joints.
- If working with sensitive stones that are subject to marring, consider sealing the surface and sides of the unit prior to the installation of WetLok™.
- Always follow the manufacturer’s instructions carefully. As the company cannot be aware of all the applications and materials the product may be used on, it is the user’s responsibility to determine suitability for use.
- Important Reminder: Wetlok Jointing Sand does not cause or prevent the growth of organic materials. Site conditions: Including elevated moisture, lack of cleaning, upkeep, organics and soil left on the hardscape surface, consistent shade, poor ventilation, can all increase the possibility of mold, moss or mildew.
- AFTER APPLYING WETLOK™
- For best results, wait 28 days after installation before cleaning and sealing.
- The jointing should not be cleaned by use of high-pressure washers until cured for at least 14 days. The distance between nozzle and joints must be at least 6” (15cm)
- PAVING
- For regular paving > 1” (2.5cm+): Fill to at least 1” (2.5cm), keeping the WetLok™ just below the paving surface
- For thin paving < 1” (2 – 2.4cm): use a trowel to excavate a 1” depth prior to installation of WetLok™ jointing sand.
- WetLok™ will not add to the integrity of the paving project and should not be relied upon to form any element of the structural makeup.
- WATER USE/FREE DRAINING BEDDING
- Proper installation of WetLok™ Jointing Sand requires large amounts of water as well as a free-draining Bedding Sand Layer and Base Layer. If the installation is lacking in either of these requirements, the quality and performance of the installation can be compromised.
- Site conditions which tend to hold moisture or stay wet, should not use SRW WetLok Jointing Sand. This includes Installations in which stone dust is used as the bedding layer. Concrete overlays without proper slope or drainage can also cause WetLok to not cure properly.
- SMOOTHING THE JOINTS
- Wait for the paved surface to dry, and ensure that the joints do not have pooled water.
- Using a Pointing Tool and very little pressure, finish the joint while being careful not to compress the sand. This step will ensure even joints while making them easier to clean in the future.
- JOINT SIZE/TYPE
- Recommended for joints between 1/8” to 3/4” (.32 cm to 1.90 cm), 1” at intersecting points.
- Minimum joint depth: 1½” (3.81 cm).
- *For porcelain tile installations keep joints between 1/8″ (.32 cm) and 1/4″ (.635 cm) with minimum joint depth of 3/4″ (1.91 cm)
- COVERAGE
- Coverage will vary depending on the surface and application. Generally, one tub will cover 45 – 60 sq. ft. (4.18 – 5.57 sq. yd.) of pavers with a 3/16”(0.48 cm) joint.
- Specific Joint Size Coverage Estimates: 3/16” joint = 51 sq. ft. per 36 lb. bucket, ¾” joint= 13.5 sq. ft. per 36 lb. bucket, 1” joint= 10.6 sq. ft. per 36 lb. bucket
- WetLok™ can be used from a 3/16” (0.48 cm) joint width all the way up to a 5” (12.7cm) joint. Wider joints will reduce overall coverage.
- Minimum joint depth is 1” (2.54 cm).
- WEATHER
- Dry and hot conditions may increase the likelihood of resins from the sand depositing on the surface of the project. This may lead to enhancement or framing along the surface edge of pavers or stones. If dry or hot conditions are likely, make sure that the surface remains wet and work in areas up to 200 sf.
- Installation during a light rain event can successfully be accomplished without issue. Covering the installation may be necessary during a heavy rain event to prevent freshly installed sand from washing out of the joints prior to curing.
- WetLok™ Jointing Sand can be used in all weather conditions. Since it is most commonly wet applied, SRW recommends that installation temperatures remain above 37F°. Freezing temps during installation will likely cause ice to form which will inhibit the proper settlement of sand into the joints.
- Freezing temps through the curing process will not affect the integrity of the final installation. It will, however, drastically increase the time to cure since all reactions will essentially stop until the ice can thaw and migrate away from the WetLok™ Jointing sand which in turn allows the resin coating to react with the air.
- If temperatures are at risk of dropping below freezing during installation, a dry installation can be used. This method increases the chance of enhancement or resin deposits on the surface of the project. This can be minimized by presealing the individual unit, tops, and sides.
- CURING
- SRW refers to the curing of WetLok™Jointing Sand as the evaporation of moisture within the paved surface and joints to allow the resin coating the sand to react with the air and cure (dry) out.
- CLEANUP AND STORAGE
- Save the original bucket to place any remaining Jointing Sand in to preserve for a later point. Fill the bucket until water is 2” over the top of the material and seal the lid.
- It is always preferable to store in a cool, dry place. However, the material is not damaged by frost or exposure to cold/wet conditions.
- It is important to keep the product protected from high temperatures. Protect packaging from punctures or piercings. Any exposure to air will start the curing process.
- The product has a 12-month shelf life, provided care is taken over its storage conditions and the product packaging is not damaged.
- MAINTENANCE
- Permeable joint material like SRW Wetlok™ Jointing sand allows moisture to filter through the sand. Over time dirt and debris may settle into the joints and alter the original appearance. Mold and Mildew may also form. These can easily be remedied by lightly pressure washing any residue from the joints on an annual basis.
- USAGE NOTES
Video
SRW WetLok™ jointing sand holds up in all weather conditions so you can get keep hardscape projects going. The self-curing, permeable jointing material works with all types of paving surfaces and requires no special equipment to successfully install.Where can I buy WetLok?
How much does a bucket of WetLok cover?
What tools do I need for a WetLok installation?
- Hose
- Spray Nozzle
- Soft Bristle Broom
- Soft Hand Brush*
- Pointing Tool*
- Squeegee for flat surfaces*
*Optional
Can Wetlok be used for Permeable Paver installations?
Per the ICPI recommendations of a permeable paver system, WetLok should not be used for permeable paver installations although it is a permeable material.
With minimal use and typical contaminants found on a project (Dirt, Dust, Debris, and Pollen), WetLok Jointing Sand would quickly fall below the infiltration rate that is required for a properly functioning Permeable Paver installation.
Since the maintenance of the Wetlok Jointing sand is to Pressure Wash the Joints to remove debris, it is likely that within a season or two the contaminants would reduce infiltration rates to a point that the permeable system would not work as designed.
Is efflorescence a concern with the increased water load WetLok can handle?
No, in traditional installations the permeability of WetLok should help mitigate the changes of efflorescence due to capillary action within the joint material as the surface of the joints heat up water will readily evaporate from the surface. Efflorescence blooms are mitigated by the fact that the water will pass through joints more readily than through the pavers. Excess water will not remain an issue unless other forces in which the moisture is entering the project are placed upon it. Examples: irrigation systems, ground water, runoff onto the project.
Do you have additional questions? Contact us.


